The construction process: from pictures to the final boat #3
August 22 2022
Building a carbon-made boat able to break the world sailing speed record is the result of a collaboration between SP80, North Thin Ply Technology, Persico Marine and Sinergia Racing Group. The four players have interacted throughout the whole construction process, one with many steps that have all led to the final product.
In this series of articles, we will show you the different production steps, from mold creations to the final assembly of parts, necessary to the construction of our record-breaking boat.
Sequencing and plybooks: the making of a construction kit
Once the molds are ready and the material for the parts is chosen comes the sequencing stage. This step consists of defining the size of the carbon fabric to apply in the molds, and in which order they should be applied. The part’s thickness, i.e the number of layers, was defined thanks to structural studies carried out by our partner Collier Aerospace.
The difficulty of applying pre-impregnated TPT® carbon to complex shapes (see our previous article for more info) makes it impossible to simply put together several carbon fabrics covering the entire surface of the mold : therefore we have to cut the fabrics so that they remain drapable and don’t form any creases when applied. Planning where to cut the fabrics can be done thanks to the 3DEXPERIENCE software, combined with the values obtained during our drapability studies.
However, each time a fabric is cut, more carbon fibers are broken. The forces applied to the boat travel and propagate through these fibers: cutting them creates discontinuities where the forces will tend to accumulate, thus weakening the part.
Let’s review some technical words
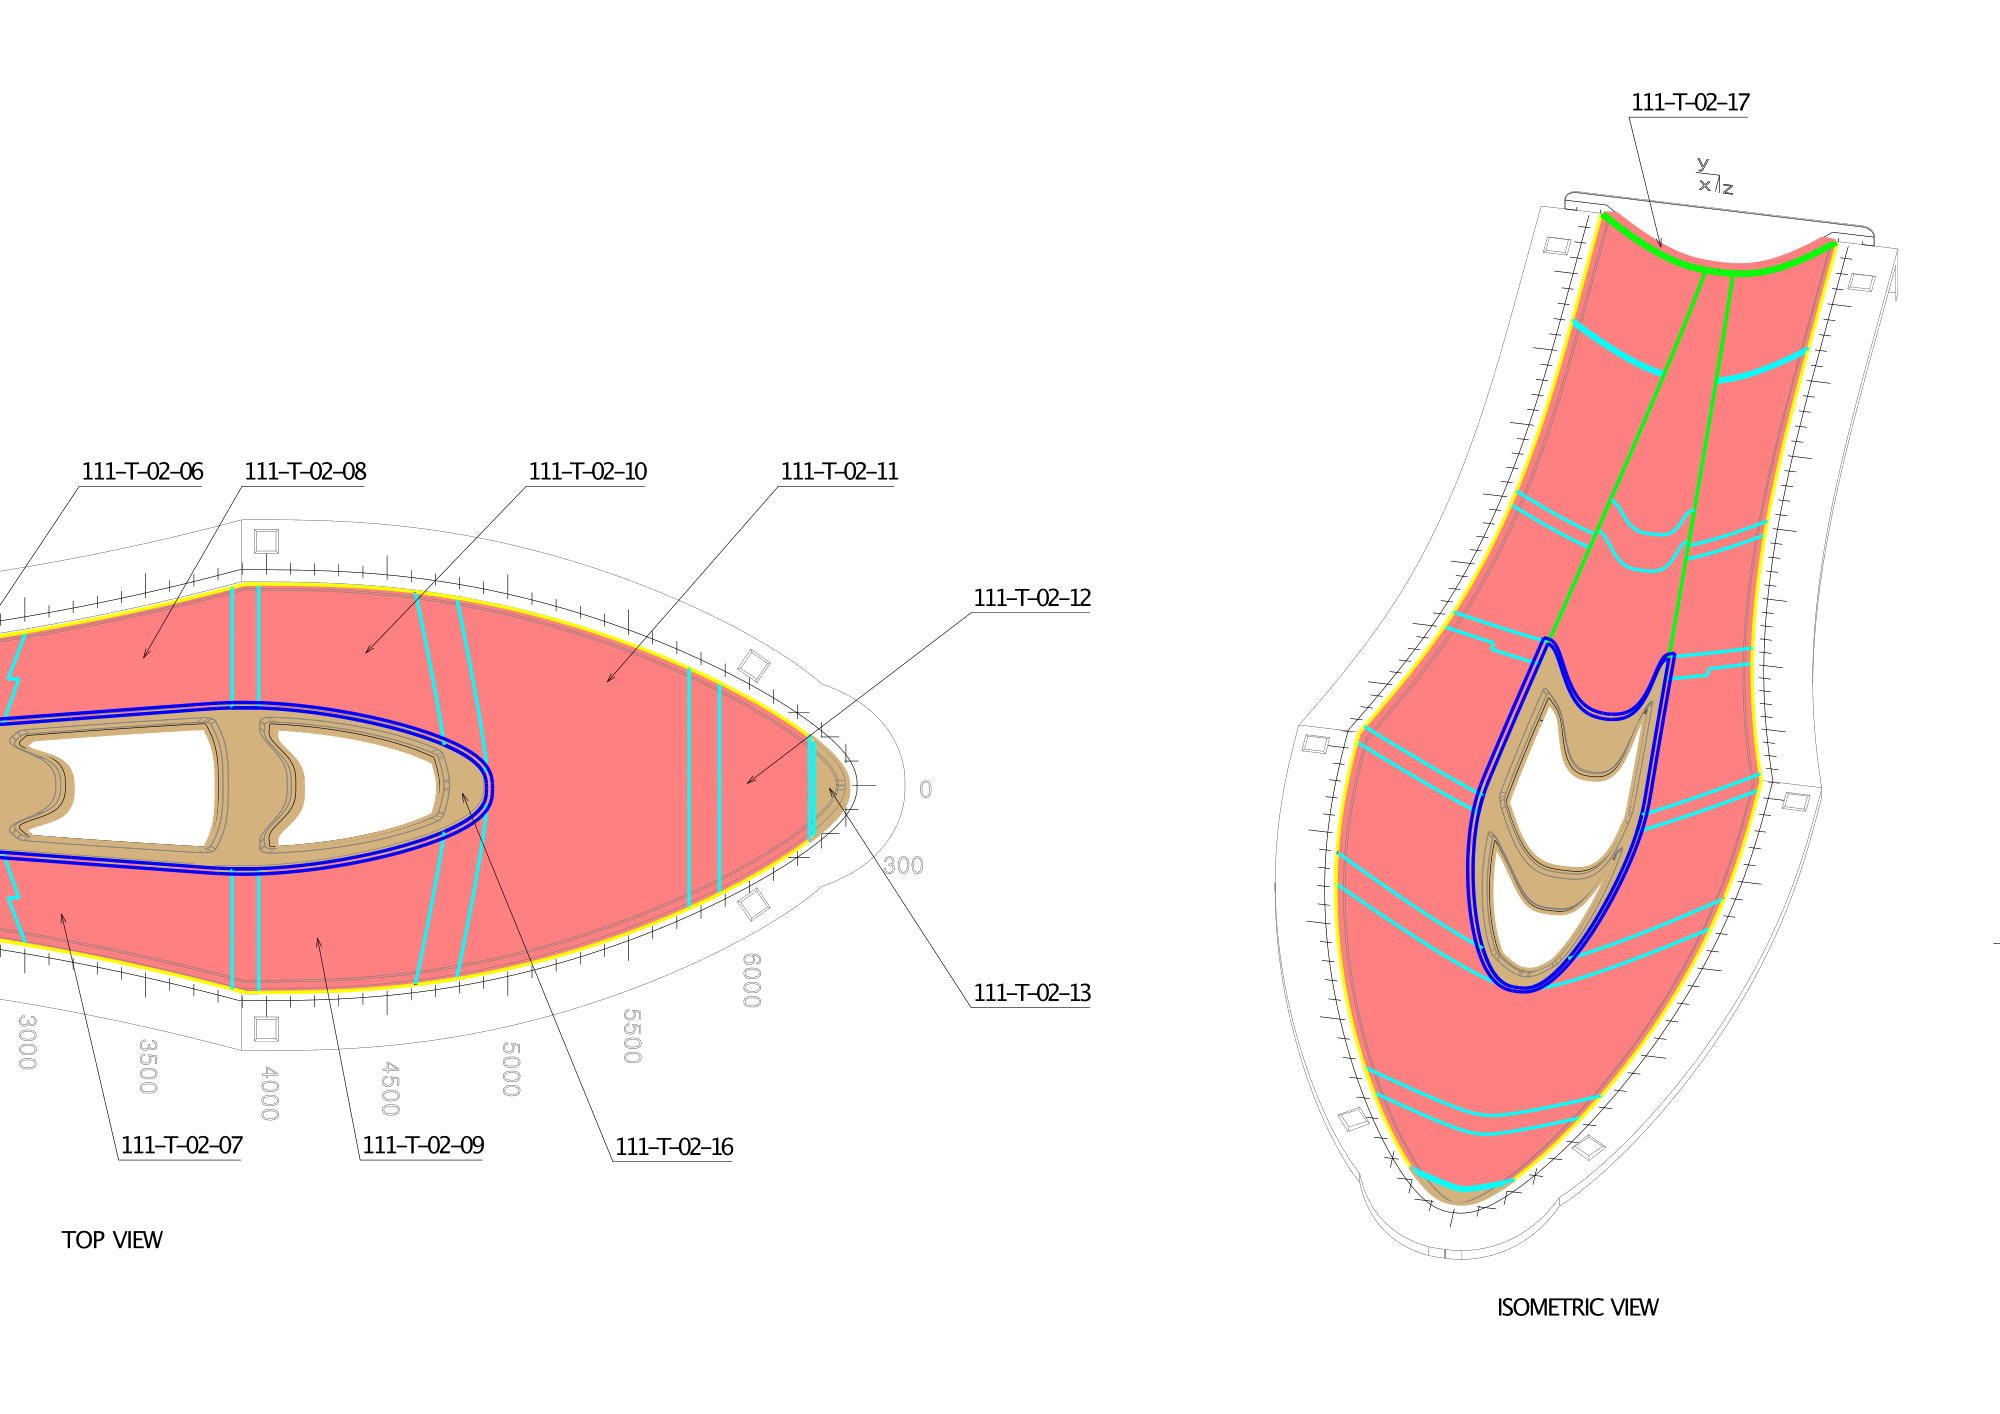
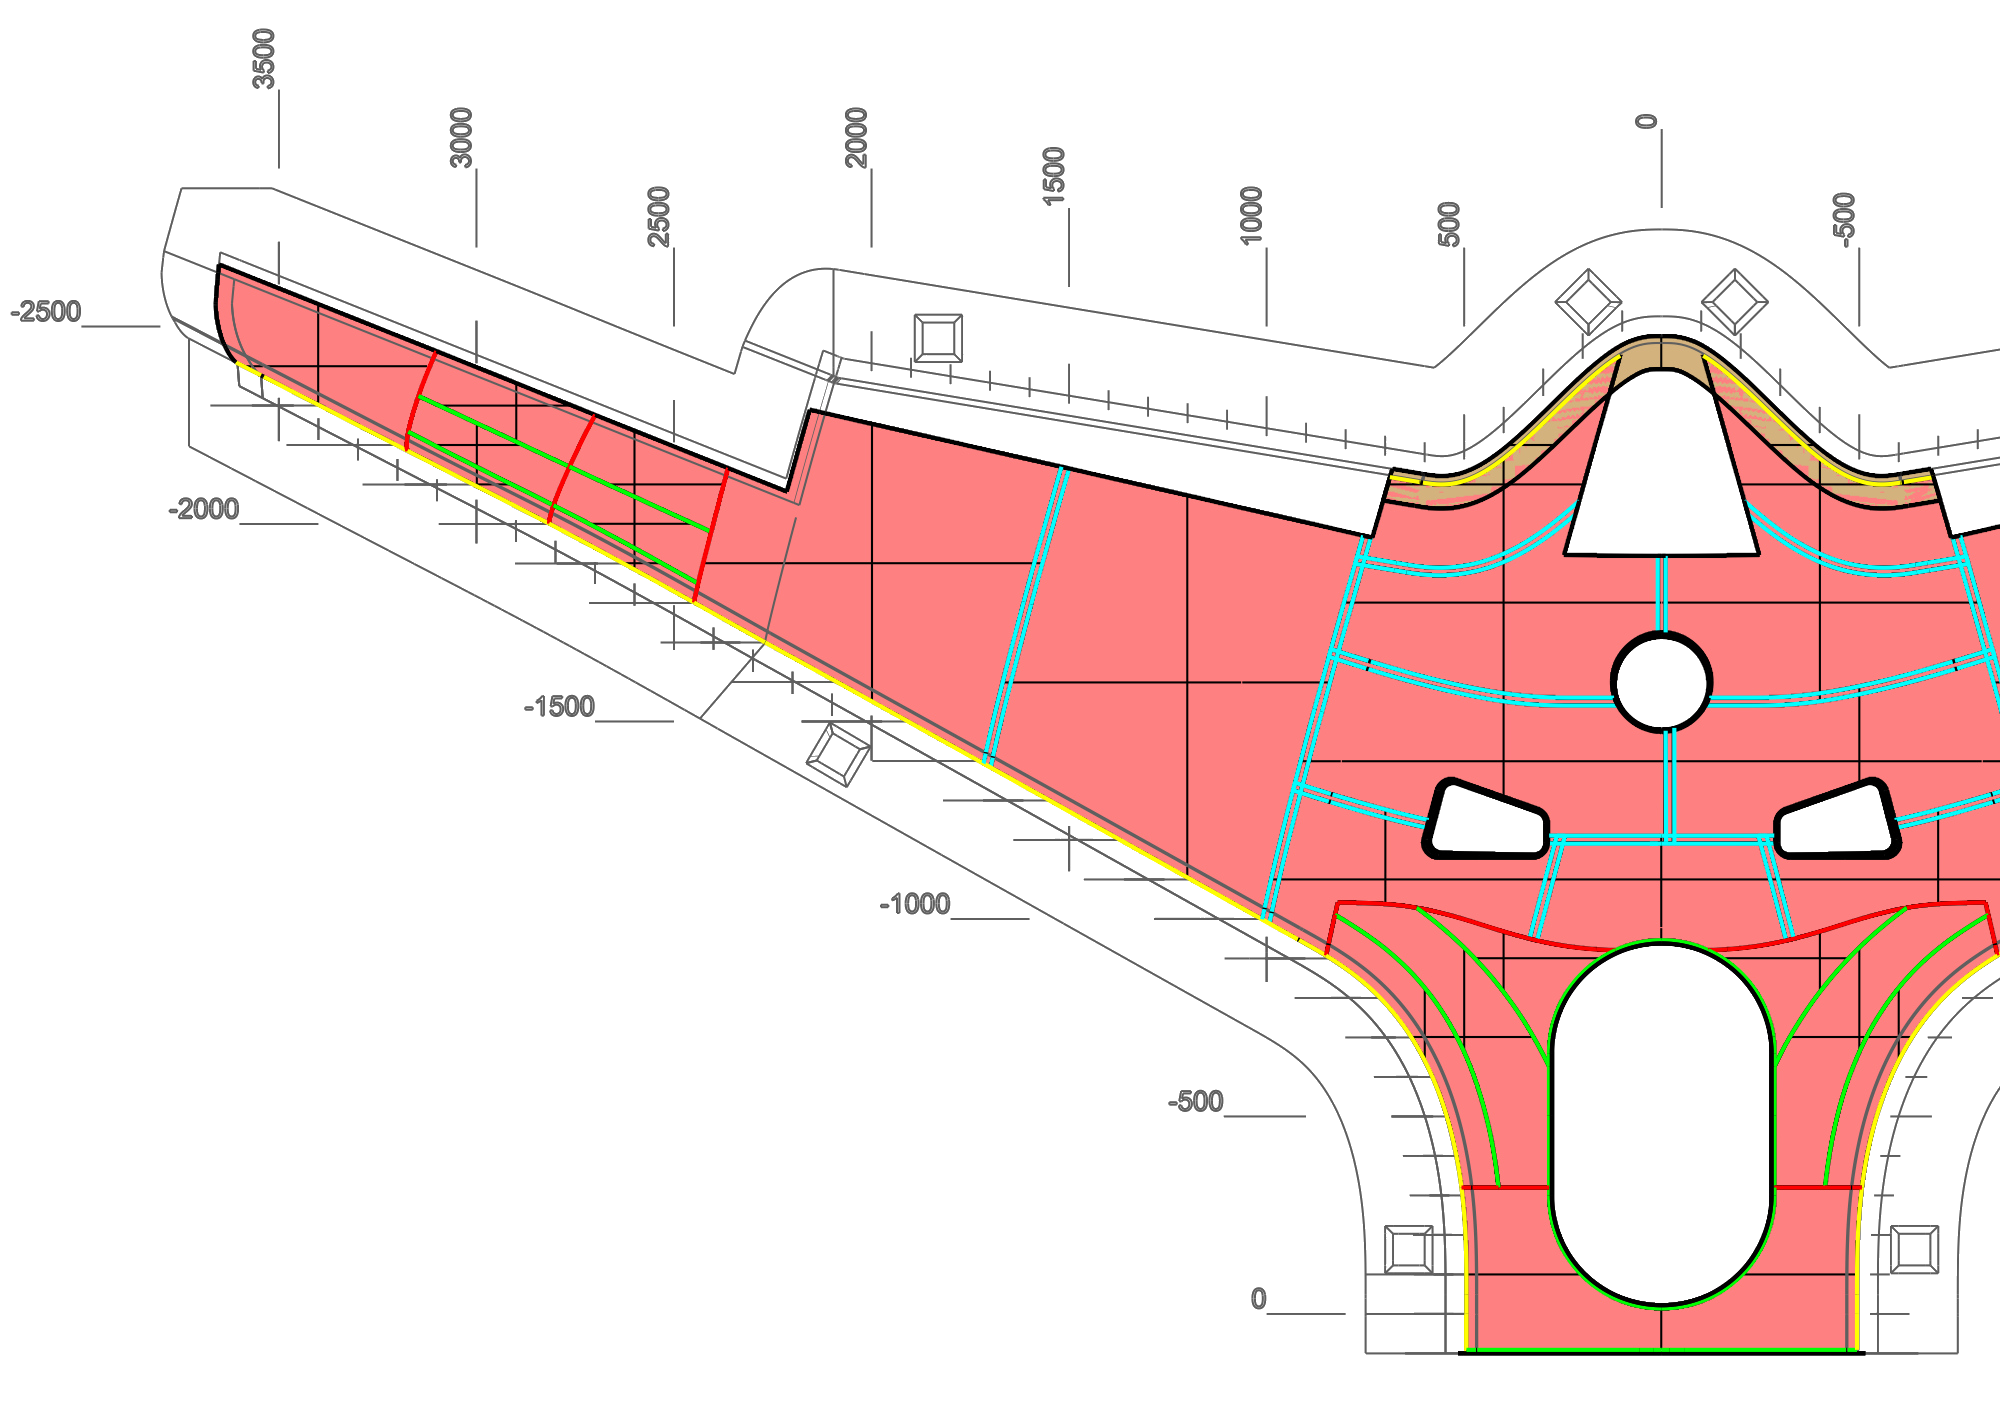
Carbon fabrics, once cut, are called plies. Those plies, once assembled, form a carbon layer on the entire surface of the mold : that’s called a sequence. For each sequence, several plies are applied in order to obtain one layer of carbon.

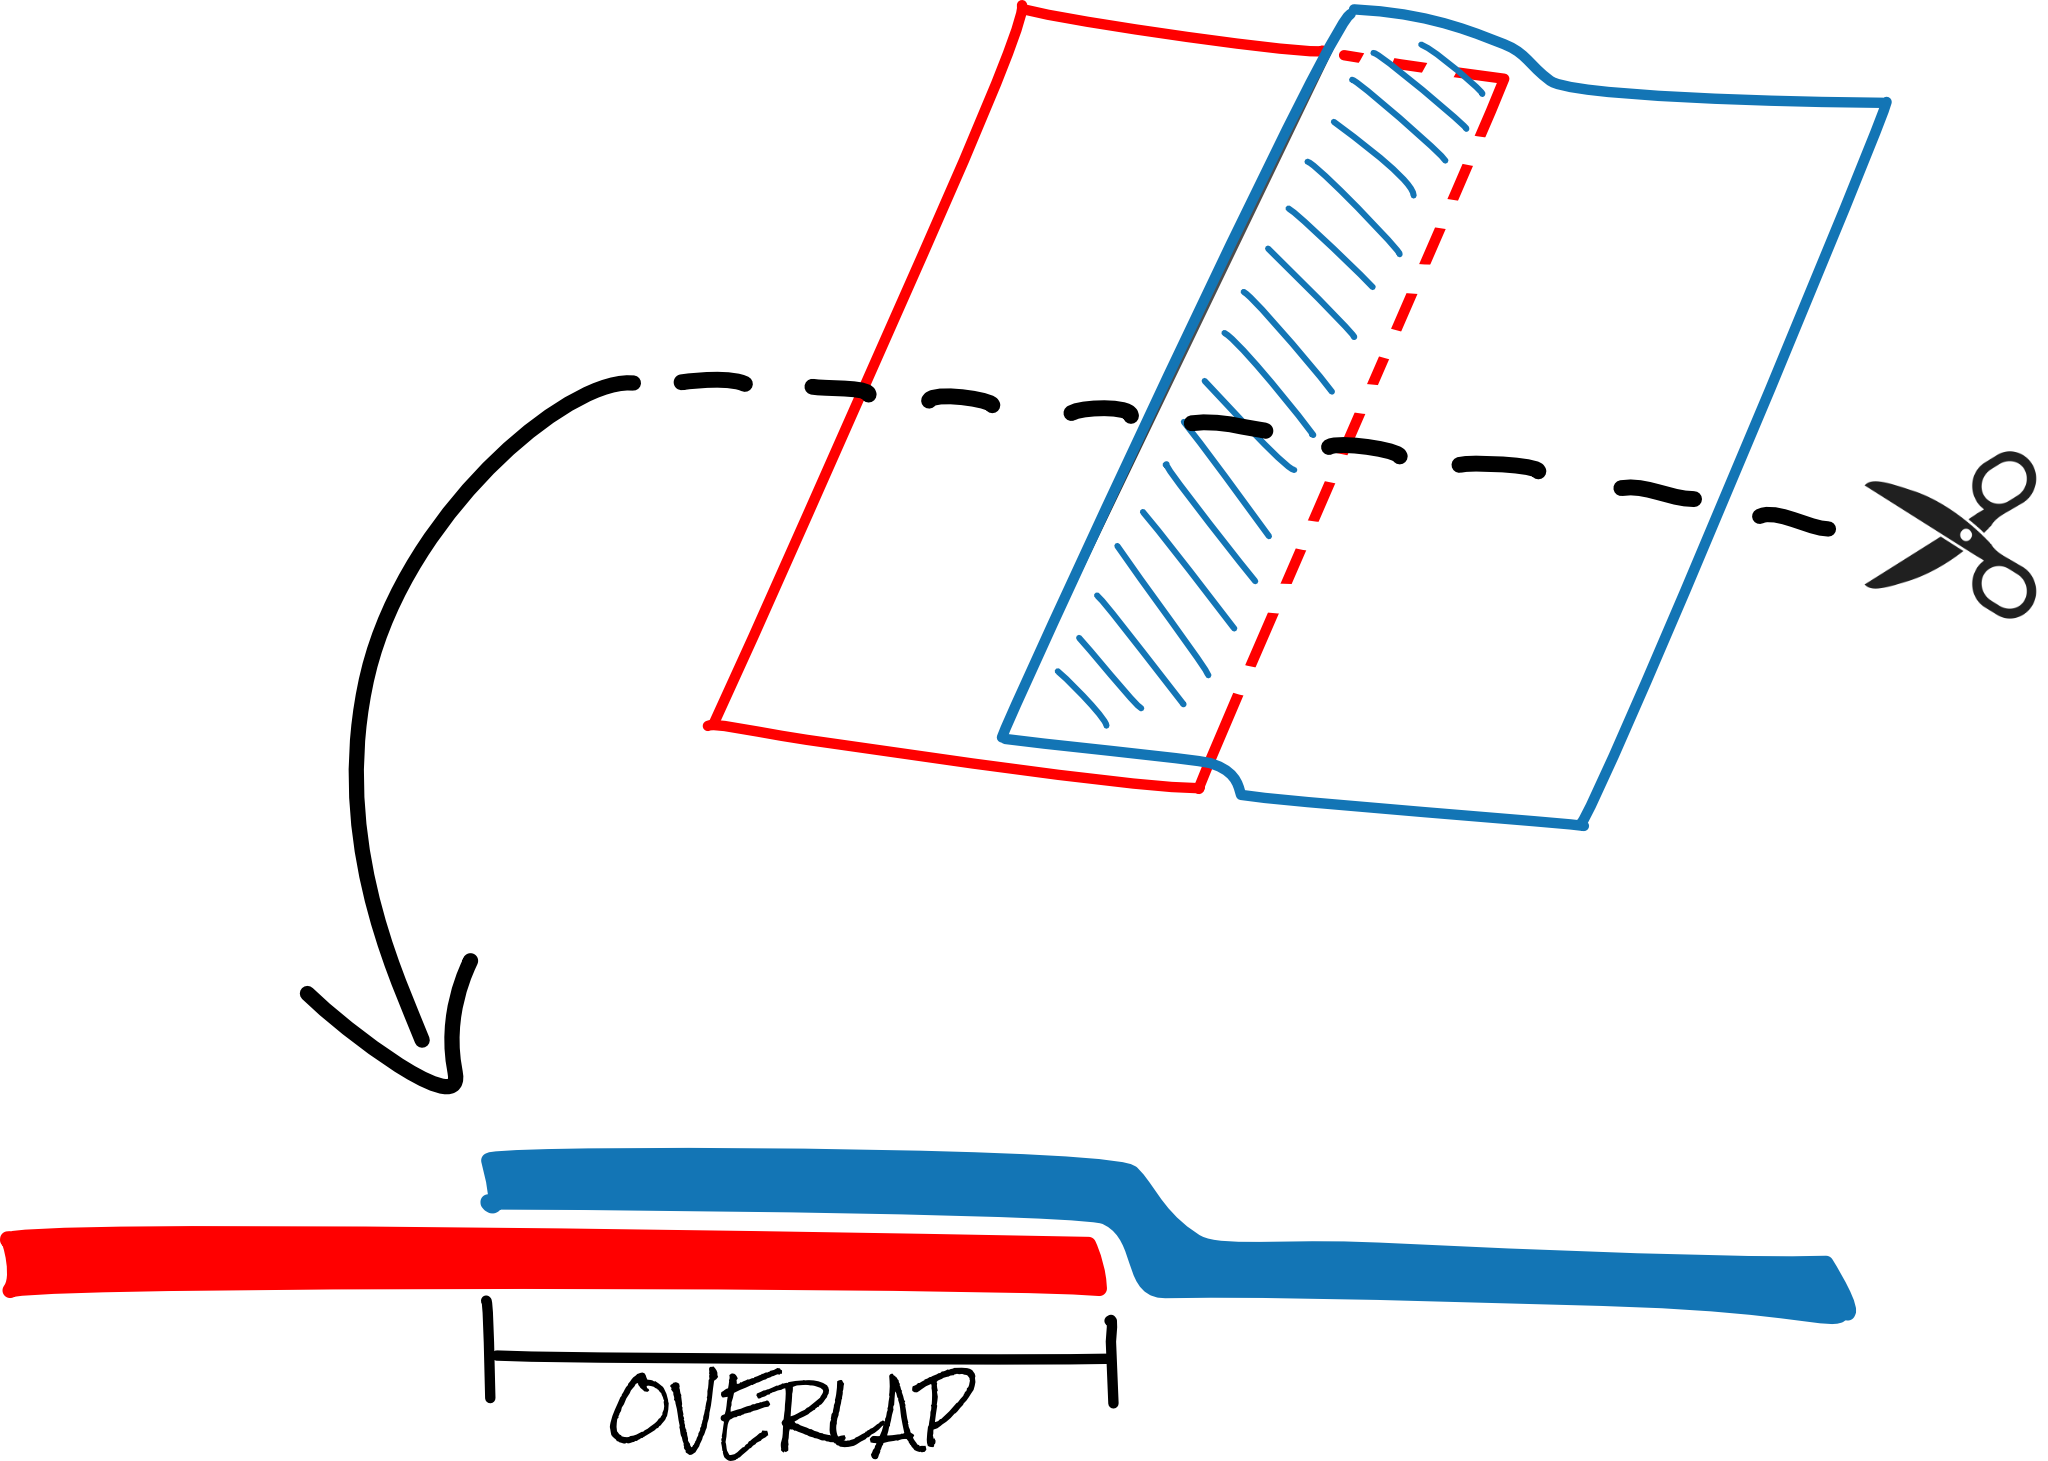
In order to limit this problem, it’s crucial to « repair » the cuts, either by adding an overlap between neighboring tissues or by moving the cuts as far apart as possible. The choice of both the type and location of the repairs must be done manually, for every fabric. A single part requires more than 700 manual repairs: this is a lot of work !

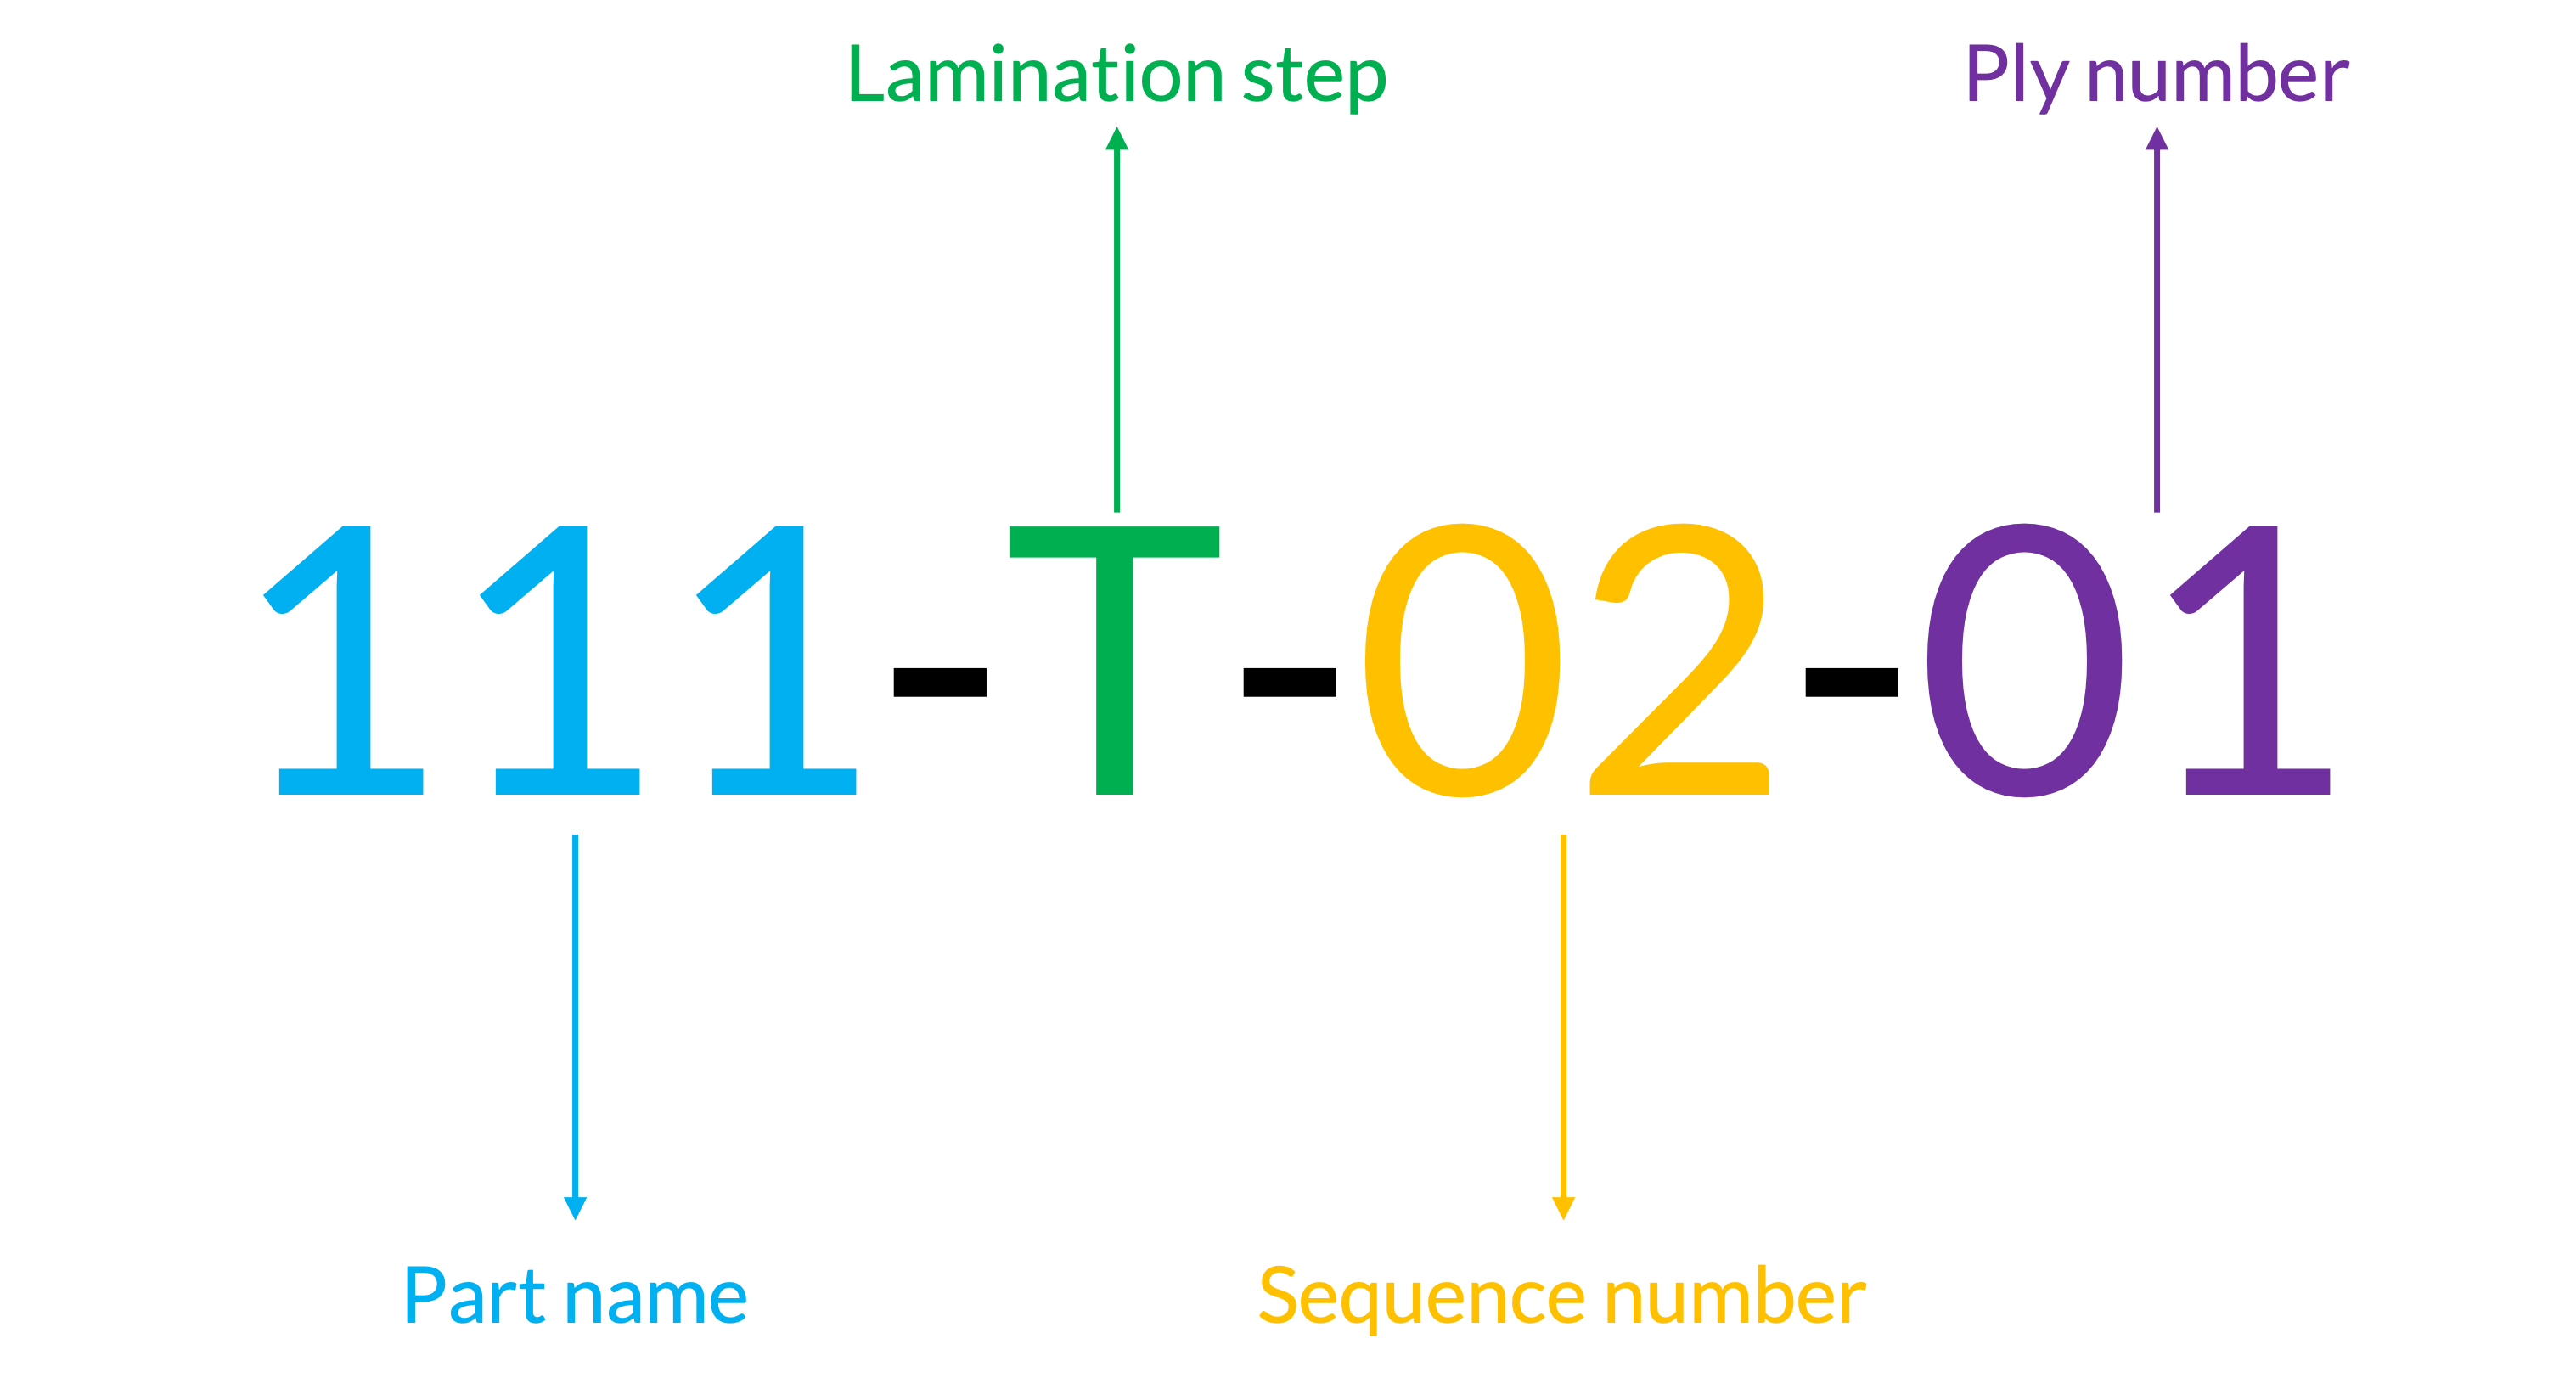
Once the size of each ply is defined, we have to name them according to a precise code, a nomenclature that will facilitate the understanding between our team and the shipyard. This code must include :
-
The part’s name ;
-
The lamination step ;
-
The sequence number ;
-
The number of the ply within the sequence

The markers that were engraved in the molds (see Article 1 of this series) are also deferred on each ply so that the shipyard has a visual aid (a little cross) during lamination.
This information can then be sent from our software 3DEXPERIENCE directly to Persico Marine so they can cut the carbon fabrics with a special machine called a plotter.
Finally, we still have to send all the indications for the application of each ply to the shipyard, which is like a huge user’s manual. This « Plybook » is a booklet that contains the names of each ply, a color to identify the type of material as well as the type of junction between the plies and the coordinates of the positioning markers. For each sequence, all these details are grouped on many pages.
This huge work done solely by the SP80 team makes it much easier for Persico Marine to stack all the plies !


A good understanding of these documents by the shipyard is essential to avoid and/or detect errors during lamination.
Learn more about sequencing & plybooks in this video
Conclusion
Once the plybooks are sent, the lamination can finally begin in the shipyard. Stay tuned for our next article…
Copyright 2025 | SP80 | All Rights Reserved

